Getting started
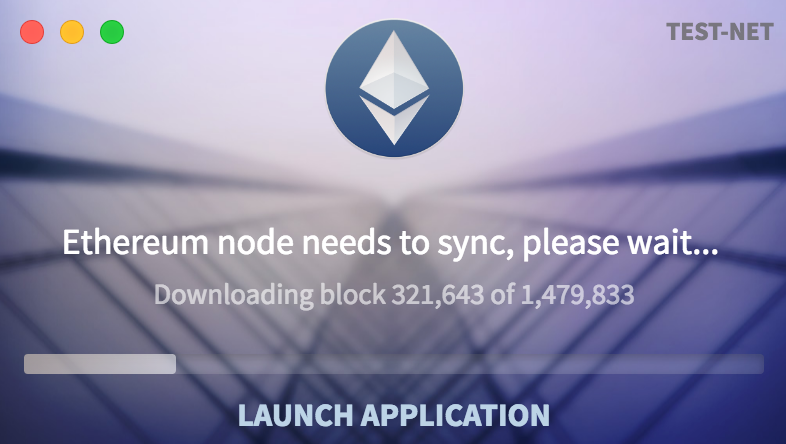
The quickest way to get started is to go to the Ethereum Project website, read as much as you can, then go through the process of downloading the Ethereum Wallet (latest one is Mist, the screenshots I show are from a previous version) and syncing with the nodes and so on.
It takes a long time to sync, so there are plenty of opportunities to read on Ethereum, watch videos, and learn more about Ethereum.
Obtaining the stuff
You can mine, purchase from a marketplace, you may even arrange to do a trade (ie real items, services) in exchange.
The quickest way to start out is to obtain from a marketplace at the exchange rate stated in that marketplace.
The other option is mining in which you can either mine with your hardware (own or dedicated hardware purchase) or use a cloud mining service.
I have bought Ethereum from a marketplace and currently trying out a cloud mining service. In the near future I am looking at the options for my own hardware to mine.
The Testnet
I guess you can call Testnet as the draft, or as the sandbox. On Testnet, after syncing, you can mine for ‘test’ ether which can later be used for testing out smart contracts.
I’ve found that Testnet GUI to sometimes be a bit confusing with some details not syncing up. This is a good time to check the logs and see what’s going on behind the scenes.
For example:
INFO [08-13|11:30:57] Network syncing, will start miner afterwards
The log above indicates that you cannot start mining in Testnet until after the Ethereum node has finished syncing.
The logs below shows that a potential block has been mined
INFO [08-13|23:06:20] Successfully sealed new block number=1482775
INFO [08-13|23:06:20] 🔨 mined potential block number=1482775
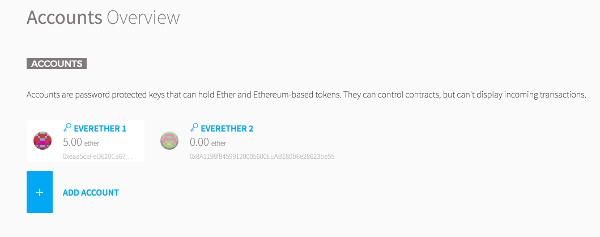
And we see that new ether is in one of the wallets on the Testnet account:
The Wallet
Once ether has been mined, you can now create your first wallet. The Ethereum Wallet currently has a UI issue in that you can create a wallet, but the wallet will always be in ‘Creating..’ mode. In this case, you must wait until ether has been mined.
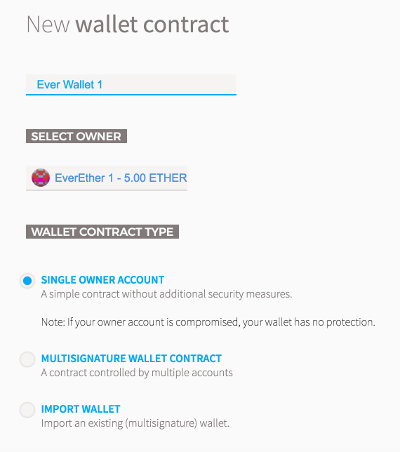
The wallet has a default JSON interface which I won’t add in this entry. The contract information is also the default provided.

I then transferred to the new wallet.

Here’s the block information about the transaction.
The Contract
Personally, I am not a fan of the usage of the word ‘smart’ with anything, be it smart contracts, smart homes, smart cities.
Right now, we are getting closer and closer to rolling out some of the interesting stuff with Ethereum.
Remember that everything is being done on Testnet. Rather than deploying directly on to production (aka the Main network), you use Testnet to deploy contracts before moving on to the Main network and using real ether.
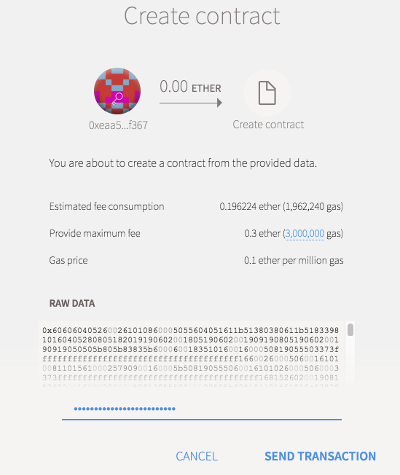
The interface allows you to specify details about the contract, which I won’t repeat here.
The ‘crux’ of it all is the contract. You specify either the Solidity contract source code, or byte code. My focus is using Solidity code.
Writing the Contract
To get started quickly, I used the Ethereum resource to create a hello world
contract mortal {
    /* Define variable owner of the type address*/
    address owner;

    /* this function is executed at initialization and sets the owner of the contract */
    function mortal() { owner = msg.sender; }

    /* Function to recover the funds on the contract */
    function kill() { if (msg.sender == owner) selfdestruct(owner); }
}

contract greeter is mortal {
    /* define variable greeting of the type string */
    string greeting;

    /* this runs when the contract is executed */
    function greeter(string _greeting) public {
        greeting = _greeting;
    }

    /* main function */
    function greet() constant returns (string) {
        return greeting;
    }
}
Deploying the first Contract - Hello EverEther World (followed by using the contract kill clause)

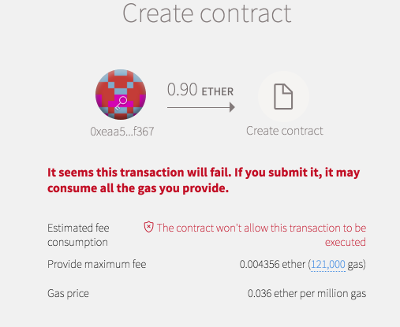
After the contract is written, there are a few other settings to change and you are now ready to deploy.
There is also another check to ensure that your contract can correctly deploy. In my first try, I was out of luck for another contract attempt:
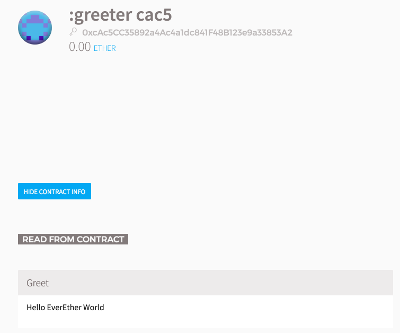
Here’s the HelloEverEtherWorld contract:
Then the kill clause or contract execution:
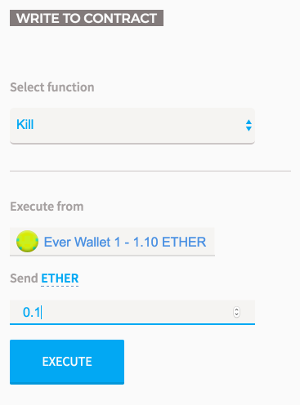
As noted by the Ethereum project::
Notice that every contract has to implement its own kill clause. In this particular case only the account that created the contract can kill it.
Developing complex contracts
There are a number of resources out there for developing Solidity is a programming language to create contracts which run on Ethereum Virtual Machine on Blockchain.
You can use the Remix web-based IDE as a way to try out the Solidity contract but there are plugins available for other IDE.
You will need to obtain more ether on Testnet in order to test these out.
Stay tuned for more details
I’ll be looking into contracts even further, as well as what can be done on associated platforms.
Thanks for your time!
Your mileage may vary. This content is constantly under development and may change at any time.